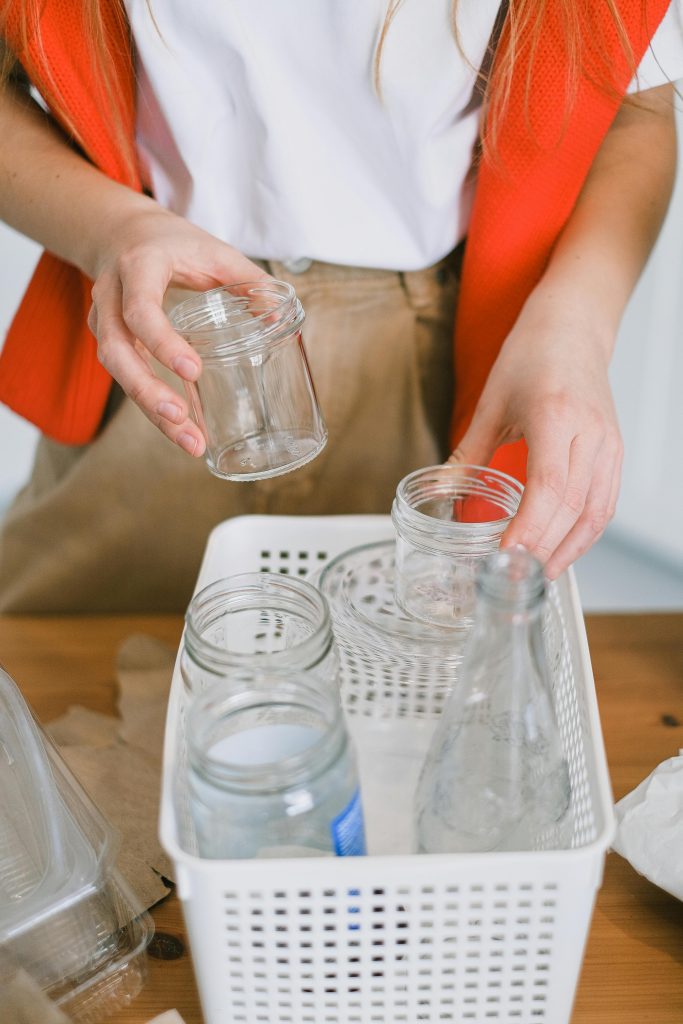
Welcome to our eco-conscious corner of the internet, where sustainability meets everyday solutions! In our ongoing quest to embrace greener living, we often find ourselves repurposing glass jars via the task of removing labels from jars for various eco-friendly endeavours. But, ah, the sticky remnants of paper labels can be a pesky obstacle on our path to sustainable practices. Fear not, fellow earth enthusiasts, for we have compiled a comprehensive guide on how to liberate your glass jars from those stubborn labels, all while keeping Mother Nature in mind.
In this blog post, we unveil a collection of 23 techniques to effortlessly remove sticky labels from glass jars. Our commitment to sustainability extends beyond the removal process, as we provide insights on minimising waste and making the most of your glass containers. Whether you’re an avid DIY enthusiast, a zero-waste advocate, or simply someone looking to elevate your green game, this guide is for you.
Join us as we explore the realms of natural remedies, common household items, and ingenious green solutions to remove stickers and unveil the pristine beauty of your glass jars and bottles. Let’s embark on a journey where sustainability meets practicality, and together, we’ll discover the joy of repurposing with a conscience. Read on, eco-warriors, for a label-free future awaits!
How to Remove Sticky Labels from Glass Jars?
Labels on glass jars can be stubborn and difficult to remove, but with the right techniques, you can easily clean them and have label-free jars. In this blog post, we will explore 23 simple ways to remove labels from glass jars, ensuring clean and residue-free results. Whether you are looking to repurpose the jars for storage or create beautiful DIY crafts, these techniques will help you effortlessly remove labels without damaging the glass.
1. Soaking in Hot Water
Soaking glass jars in hot water is a straightforward and effective method for removing sticky labels. The heat from the water helps to soften the adhesive, making it easier to peel off the label and eliminate any residual stickiness. This sticker removing technique is user-friendly and requires minimal effort, making it an ideal choice for those who prefer a simple, hands-off approach.
- Fill with Hot Water: Begin your quest to remove labels from jars by filling a sink or basin with comfortably hot water. The temperature should be warm enough to facilitate the loosening of the adhesive without causing any damage to the glass.
- Soak the Jar: Ensure that the glass jar is fully submerged in the hot water to effectively remove labels and glue. This ensures that the jar label receives thorough exposure to the warmth, aiding in the removal process.
- Allow to Soak: Let the glass jar soak in the hot water for approximately 15 to 30 minutes. During this time, the heat will penetrate the label, weakening the adhesive and making it easier to peel off.
- Gently Remove the Label: After the soaking period, use a sponge or scrub brush to gently peel off the label. The softened adhesive should come off more easily, leaving the glass jar clean and ready for reuse.
This method is particularly convenient for individuals who prefer a minimalistic and low-effort approach to label removal. It’s a great starting point for those new to the process of repurposing glass jars, offering an eco-friendly solution without the need for specialized tools or chemicals.
2. Using Dish Soap and Water
The method of using dish soap and water is a practical and accessible approach for removing sticky labels from glass jars. By incorporating the cleaning power of dish soap, this technique not only aids in breaking down adhesive residues but also ensures that the glass jar is thoroughly cleansed.
- Prepare a Soapy Solution: Begin by filling a sink or basin with warm water. Add a few drops of dish soap to create a soapy solution. The warm water helps in loosening the adhesive, while the dish soap enhances its effectiveness.
- Submerge the Glass Jar: Place the glass jar into the soapy water, ensuring that the label is fully submerged. Allow it to soak for an extended period to let the soap penetrate and work on the adhesive.
- Soak and Soften: Leave the glass jar to soak for at least 60 minutes. This extended soaking time allows the soap to soften the label and the adhesive, making it easier to peel off.
- Scrub with a Sponge or Brush: After soaking, use a sponge or scrub brush to gently scrub the label. The combination of warm, soapy water and physical agitation helps to lift the label and eliminate any remaining residue.
- Rinse Thoroughly: Rinse the glass jar under running water to remove any soap and residual adhesive. Ensure that the jar is clean and free from any sticky remnants.
This technique is an eco-friendly and easily accessible option, utilizing common household items to achieve a label-free glass jar. It’s particularly suitable for those who prefer a gentler approach without the use of harsh chemicals.
3. Applying Vinegar
Using vinegar is a versatile and natural method for removing sticky labels from glass jars. The acidic properties of vinegar help to break down the adhesive, making it easier to peel off the label and eliminate any residue.
- Soak a Cloth in White Vinegar: Start by soaking a cloth or paper towel in white vinegar. White vinegar is preferred for its mild acidity, which is effective in breaking down adhesives without being overly harsh.
- Place the Vinegar-Soaked Cloth on the Label: Lay the vinegar-soaked cloth directly onto the label of the glass jar. Ensure that the entire label is covered by the cloth. This allows the vinegar to penetrate the label and work on the adhesive.
- Allow Time to Soak: Leave the vinegar-soaked cloth in place for approximately 15 to 30 minutes. This soaking time allows the vinegar to soften the label and weaken the adhesive bond.
- Peel Off the Label: After the soaking period, peel off the label. The softened adhesive should make it easier to remove the label without excessive effort.
- Wipe Away Residue: Use the vinegar-soaked cloth to wipe away any remaining adhesive residue on the glass jar. The acidity of the vinegar helps dissolve and lift the sticky remnants.
- Rinse the jar thoroughly with water to remove any vinegar smell.
This method is an environmentally friendly alternative, utilizing a common household item to achieve label removal. It is particularly effective for individuals who prefer natural solutions and want to avoid the use of stronger chemicals. Ensure proper ventilation, as the smell of vinegar dissipates quickly, leaving you with a clean and label-free glass jar.
4. Rubbing Alcohol Method
The rubbing alcohol method is a quick and effective way to remove sticky labels from glass jars. Rubbing alcohol, also known as isopropyl alcohol, serves as a solvent that helps break down adhesives, facilitating easy label removal and minimizing residue.
- Soak a Cloth or Cotton Ball in Rubbing Alcohol: Begin by soaking a cloth or cotton ball in rubbing alcohol. Ensure that it is saturated but not dripping.
- Apply Alcohol to the Label: Gently apply the rubbing alcohol-soaked cloth or cotton ball directly onto the label of the glass jar. Ensure that the entire label is covered. The alcohol will begin to dissolve the adhesive.
- Allow Time to Penetrate: Allow the rubbing alcohol to penetrate the label for about 5-10 minutes. This gives the alcohol sufficient time to break down the adhesive bond.
- Peel Off the Label: After the soaking period, peel off the label. The rubbing alcohol helps loosen the adhesive, making it easier to remove the label without leaving behind excessive residue.
- Wipe Away Any Remaining Residue: Use the rubbing alcohol-soaked cloth to wipe away any residual adhesive on the glass jar. The alcohol will evaporate quickly, leaving the jar clean and label-free.
- Rinse the jar with warm water to remove the alcohol smell.
This method is a convenient option for those seeking a rapid solution. Rubbing alcohol is readily available in most households and is effective in removing labels from glass jars without the need for extensive soaking. It’s a great choice for quick label removal with minimal effort.
5. Using Baking Soda and Oil
The combination of baking soda and oil creates a powerful yet gentle paste that is effective in removing sticky labels from glass jars. Baking soda acts as a mild abrasive to help lift the label, while the oil works to break down the adhesive.
- Create a Baking Soda Paste: Mix equal parts baking soda and a common household oil, such as vegetable or olive oil, to form a paste. The consistency should be thick enough to adhere to the label.
- Apply the Paste to the Label: Spread the baking soda and oil paste generously over the entire label of the glass jar. Ensure that the label is fully covered by the paste.
- Allow Time to Sit: Let the paste sit on the label for about 15-30 minutes. This gives the baking soda and oil mixture time to penetrate the label and work on breaking down the adhesive.
- Scrub with a Brush or Sponge: Use a scrub brush or sponge to gently scrub the label. The baking soda acts as a mild abrasive, helping to lift the label, while the oil works to dissolve the adhesive.
- Rinse Thoroughly: Rinse the glass jar under running water to remove the baking soda paste and any residual adhesive. Ensure that the jar is clean and free from any sticky remnants.
This method provides an effective and environmentally friendly solution for label removal, utilizing common kitchen ingredients. The combination of baking soda and oil is gentle on the glass surface while efficiently tackling adhesive residues. It’s a versatile option for those looking to repurpose glass jars with minimal effort and natural ingredients.
6. Lemon Juice
The lemon juice method harnesses the natural acidity of lemons to effectively remove sticky labels from glass jars. Lemon juice serves as a mild yet powerful solvent, breaking down adhesives and making label removal a citrus-infused breeze.
- Squeeze Fresh Lemon Juice: Begin by extracting fresh lemon juice. You can use a lemon squeezer or manually squeeze the juice from a lemon. The acidity in fresh lemon juice is key to breaking down adhesive bonds.
- Apply Lemon Juice to the Label: Generously apply the fresh lemon juice directly onto the label of the glass jar. Ensure that the label is thoroughly covered by the lemon juice.
- Allow Time to Work: Let the lemon juice sit on the label for about 15-30 minutes. During this time, the natural acids in the lemon juice work to dissolve the adhesive, making it easier to peel off the label.
- Peel Off the Label: After the soaking period, peel off the label. The softened adhesive should allow for smooth label removal without excessive effort.
- Wipe Away Residue: Use a cloth or sponge to wipe away any remaining adhesive residue on the glass jar. The acidity of the lemon juice helps dissolve and lift the sticky remnants.
- Rinse Thoroughly: Rinse the glass jar under running water to remove any lemon juice and residual adhesive. Ensure that the jar is clean and ready for its new purpose.
This method offers a natural and refreshing alternative, utilizing the power of lemon juice to achieve label-free glass jars. It’s a particularly appealing option for those who prefer natural solutions and enjoy the pleasant citrus aroma left behind by the lemons.
7. Hairdryer Method
The hairdryer method employs the use of heat to soften the adhesive, making it easier to peel off labels from glass jars. This technique is a quick and convenient way to remove labels without the need for soaking.
- Plug in the Hairdryer: Begin by plugging in a hairdryer and setting it to a medium or high heat setting. Ensure that it’s positioned at a safe distance from the glass jar.
- Heat the Label: Direct the hot air from the hairdryer onto the label of the glass jar. Keep the hairdryer moving to evenly distribute the heat across the label surface. Heat the label for approximately 1-2 minutes.
- Peel Off the Label: Once the label is adequately heated, use your fingers or a tool like a knife or credit card to gently peel off the label. The heat should have softened the adhesive, making the label removal smoother.
- Wipe Away Residue: If there is any remaining adhesive residue, use a cloth or sponge to wipe it away while it’s still warm. The softened adhesive should be easier to remove at this point.
- Clean the Glass Jar: To finish, give the glass jar a quick rinse under running water to remove any leftover residue and ensure it’s clean and ready for reuse.
This method is particularly handy for those looking for a swift solution without the need for soaking or chemical agents. The hairdryer method is suitable for glass jars that may be sensitive to prolonged exposure to water or for individuals seeking a quick label removal process.
8. Oven Method
This method may be familiar to those who pickle or preserve food in jars. The oven method utilises heat to warm up the glass jar, making it easier to peel off labels and adhesive residues. These techniques are efficient and suitable for those who prefer a hands-off heating method. Please remember that glass that is heated or cooled too quickly runs the risk of shattering.
- Preheat the Oven: Set your oven to a low temperature, typically around 200°F (90°C). Allow it to preheat while you prepare the glass jar.
- Place the Glass Jar in the Oven: Put the glass jar in the preheated oven, ensuring that it stands on a heat-resistant surface. Let it warm up gradually.
- Peel Off the Label: Once the jar is warm, carefully peel off the label. The heat should have softened the adhesive, making it easier to remove.
- Wipe Away Residue: If there’s any remaining adhesive, use a cloth or sponge to wipe it away while it’s warm. The softened adhesive is easier to clean at this point.
- Cool and Clean: Allow the glass jar to cool down before cleaning it thoroughly. A rinse under running water will remove any remaining residue, leaving the jar ready for use.
9. Microwave Method
- Ensure Jar is Microwave-Safe: Confirm that the glass jar is labeled as microwave-safe. Not all glass jars can withstand the heat generated by microwaving.
- Microwave the Glass Jar: Place the glass jar in the microwave and heat it on a low setting for short intervals (10-15 seconds each time). Be cautious not to overheat the jar.
- Peel Off the Label: After microwaving, carefully peel off the label. The heat should have softened the adhesive, making the label removal easier.
- Wipe Away Residue: If there’s any remaining adhesive, use a cloth or sponge to wipe it away while it’s still warm.
- Cool and Clean: Allow the glass jar to cool down before cleaning it thoroughly. Rinse it under running water to remove any residual adhesive.
Both methods are convenient for those who prefer dry heat solutions and want to avoid prolonged soaking. The choice between the oven and microwave depends on personal preference and the suitability of the glass jar for each method.
10. Freezing Technique
The freezing technique is an unconventional yet effective method for removing sticky labels from glass jars. By subjecting the jar to freezing temperatures, the adhesive becomes brittle, allowing for easier label removal.
- Empty the Glass Jar: Ensure that the glass jar is empty and free from any food or liquids. Cleaning the jar beforehand prevents any contaminants from affecting the freezing process.
- Place the Glass Jar in the Freezer: Put the empty glass jar in the freezer, making sure it stands upright. Allow it to freeze for several hours or overnight. The extended freezing time helps make the adhesive more brittle.
- Remove the Glass Jar: Once adequately frozen, take the glass jar out of the freezer. Handle it carefully to avoid breakage.
- Scrape Off the Label: Use a knife, credit card, or any other flat tool to gently scrape off the frozen label. The cold temperature should have made the adhesive more rigid, allowing for easier removal.
- Rinse Away Residue: Rinse the glass jar under running water to remove any remaining adhesive residue. The combination of freezing and rinsing should leave the jar clean and label-free.
- Dry the Glass Jar: Ensure the glass jar is thoroughly dried before using or storing it to prevent any potential moisture-related issues.
This method is suitable for those who prefer a non-liquid approach to label removal and have the patience to wait for the freezing process to take effect. It is particularly useful for jars with labels that are resistant to other removal methods.
11. Do Nothing and Leave the Label On
For those who appreciate a touch of minimalism or simply wish to save time, leaving the labels on your glass jars can be an easy and carefree choice. This approach is particularly suitable for those untroubled by the aesthetics of an Instagram-worthy pantry.
You could also consider simply covering the existing labels with fresh, personalized ones, offering both a quick fix and a touch of individuality to your glass jars.
Over time, as these jars make their way through the dishwasher or endure hand washing, the labels will naturally come off. However, be mindful that this method might lead to the persistence of sticky residue issues, especially with stubborn labels like those found on Vegemite and Moccona jars.
12. Essential Oils
The essential oils method involves using aromatic plant extracts to dissolve adhesive residues on glass jars. Essential oils, known for their pleasant scents and natural properties, can be effective solvents for breaking down sticky substances.
- Choose an Essential Oil: Select an essential oil with adhesive-dissolving properties. Citrus-based oils like lemon or orange, eucalyptus, tea tree, and lavender oils are commonly used.
- Apply Essential Oil to the Label: Dab a few drops of the chosen essential oil directly onto the label of the glass jar. Ensure that the oil covers the entire label.
- Allow Time to Penetrate: Let the essential oil sit on the label for approximately 15-30 minutes. The natural properties of the oil will work to dissolve the adhesive, making it easier to remove.
- Peel Off the Label: After the soaking period, peel off the label. The essential oil should have loosened the adhesive, facilitating a smoother removal process.
- Wipe Away Residue: Use a cloth or sponge to wipe away any remaining adhesive residue on the glass jar. The essential oil not only dissolves the adhesive but also leaves a pleasant fragrance.
- Rinse and Clean: Rinse the glass jar under running water to remove any essential oil and residual adhesive. Ensure that the jar is clean and ready for reuse.
This method is a natural and aromatic alternative, utilizing the power of essential oils to achieve label-free glass jars. It’s suitable for those who appreciate the added benefit of a pleasing scent during the label removal process and prefer natural solutions.
13. Razor Blade
The razor blade method involves using a razor blade or sharp utility knife to carefully scrape off labels and adhesive residues from glass jars. This technique is precise and effective, but it requires caution to avoid injury.
- Ensure Safety: Before starting, ensure that you have a steady hand and take necessary safety precautions. Wear gloves to protect your hands, and be mindful of the sharpness of the razor blade.
- Peel Off Any Loose Label: If there is any part of the label that can be peeled off easily, start by removing it with your fingers. This reduces the amount of material you need to deal with using the razor blade.
- Hold the Razor Blade at an Angle: Hold the razor blade at a shallow angle against the glass surface, near the edge of the label. Avoid holding the blade perpendicular to the glass to minimize the risk of scratching.
- Scrape Gently: With a gentle and controlled motion, scrape the razor blade across the label, working in small sections. Apply enough pressure to remove the label but not so much that it damages the glass.
- Continue Scraping: Continue scraping until the label is completely removed. If there’s any adhesive residue left, you can use the razor blade to carefully scrape it away.
- Clean the Glass Surface: After label removal, clean the glass surface with a damp cloth to remove any remaining adhesive particles.
- Dispose of Razor Blades Safely: If using disposable razor blades, ensure proper disposal in a safe container to prevent injuries. If using a utility knife, retract the blade when not in use.
This method is suitable for those seeking a hands-on and precise approach to label removal. It’s important to exercise caution to avoid accidents, and it may not be suitable for those concerned about scratching the glass surface.
14. Nail Polish Remover (Acetone)
The nail polish remover method utilizes acetone, a powerful solvent found in many nail polish removers, to dissolve adhesive residues on glass jars. This method is effective but should be used with caution, especially on coloured or painted glass surfaces.
- Check for Acetone Content: Ensure that your nail polish remover contains acetone. Acetone is a strong solvent that effectively breaks down adhesives.
- Dab a Cotton Ball or Cloth: Apply a small amount of acetone to a cotton ball or a soft cloth. Be cautious not to oversaturate, especially if dealing with coloured or painted glass.
- Apply to the Label: Gently rub the acetone-soaked cotton ball or cloth onto the label of the glass jar. Ensure that the acetone covers the entire label.
- Allow Time to Penetrate: Let the acetone sit on the label for a short period, around 1-2 minutes. This gives the acetone time to dissolve the adhesive.
- Peel Off the Label: After the soaking period, peel off the label. The acetone should have softened the adhesive, making the label removal smoother.
- Wipe Away Residue: Use the acetone-soaked cotton ball or cloth to wipe away any remaining adhesive residue on the glass jar.
- Clean the Glass Surface: After label removal, clean the glass surface with a damp cloth to remove any remaining acetone and adhesive particles.
- Handle with Care: Acetone can be harsh on certain surfaces, so use this method with caution, especially on painted or coloured glass. Test a small, inconspicuous area first.
This method is suitable for those looking for a quick and effective solution using a readily available household item. However, it’s important to exercise caution, especially on glass surfaces with special finishes or colours, as acetone can potentially damage them.
15. Sodium percarbonate and hot water
Sodium percarbonate is a powdered substance that releases hydrogen peroxide when dissolved in water. This method utilizes the oxygenating properties of sodium percarbonate combined with hot water to break down adhesive residues on glass jars.
- Prepare a Sodium Percarbonate Solution: In a container, mix hot water with sodium percarbonate. The suggested ratio is typically 1-2 tablespoons of sodium percarbonate per cup of hot water.
- Dissolve Sodium Percarbonate: Stir the mixture thoroughly to ensure that the sodium percarbonate dissolves in the hot water. This creates an oxygenated solution.
- Submerge the Glass Jar: Submerge the glass jar in the sodium percarbonate solution, ensuring that the label and any adhesive residue are fully covered.
- Soak for 15-30 Minutes: Allow the glass jar to soak in the solution for approximately 15-30 minutes. The oxygen released from sodium percarbonate helps break down the adhesive.
- Peel Off the Label: After soaking, peel off the label. The softened adhesive should make the label removal easier.
- Wipe Away Residue: Use a cloth or sponge to wipe away any remaining adhesive residue on the glass jar.
- Rinse Thoroughly: Rinse the glass jar under running water to remove any residual sodium percarbonate solution and adhesive particles.
- Dry the Glass Jar: Ensure the glass jar is thoroughly dried before use or storage.
This method is effective for those looking for an oxygen-based solution that can be gentler than some chemical solvents. Sodium percarbonate is also considered environmentally friendly as it decomposes into oxygen, water, and soda ash. However, as with any cleaning solution, it’s advisable to test a small, inconspicuous area first, especially on coloured or painted glass surfaces.
16. Peanut butter
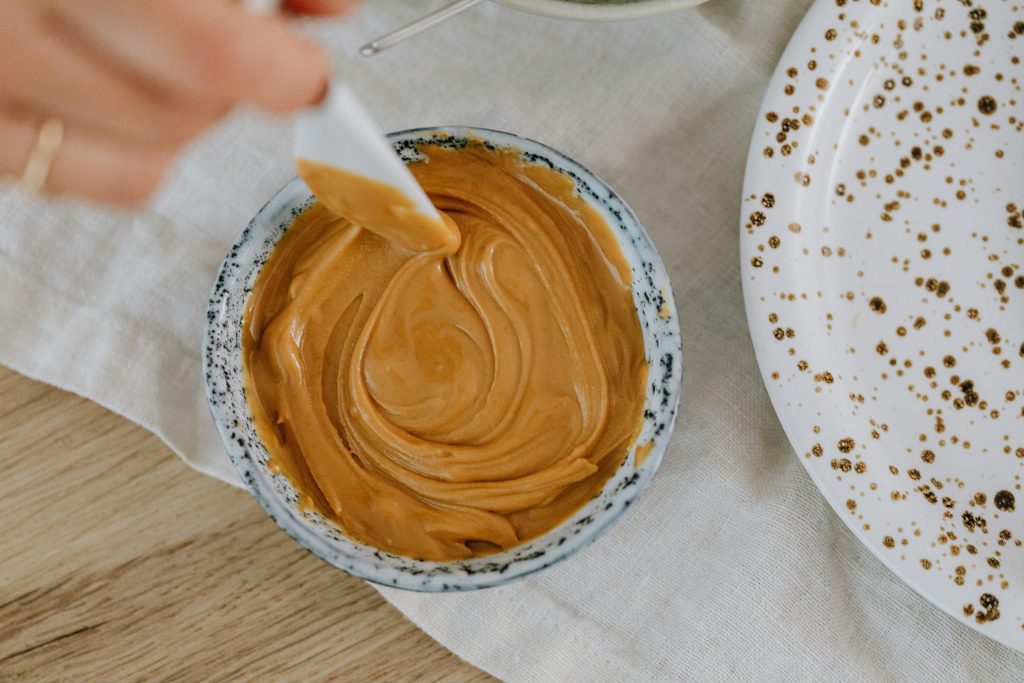
The peanut butter method is a unique and surprisingly effective technique for removing sticky labels from glass jars. Peanut butter’s natural oils and texture can help break down adhesive residues, making label removal easier.
- Select Creamy Peanut Butter: Choose creamy peanut butter for this method. The smooth texture and natural oils in peanut butter work well for breaking down adhesive.
- Apply Peanut Butter to the Label: Spread a generous layer of creamy peanut butter directly onto the label of the glass jar. Ensure that the entire label is covered.
- Allow Time to Sit: Allow the peanut butter to sit on the label for about 30-60 minutes. This gives the natural oils in the peanut butter time to penetrate and loosen the adhesive.
- Peel Off the Label: After the soaking period, peel off the label. The peanut butter should have softened the adhesive, making it easier to remove the label.
- Wipe Away Residue: Use a cloth or sponge to wipe away any remaining adhesive residue on the glass jar. The oils in peanut butter also contribute to cleaning the glass surface.
- Clean the Glass Surface: Clean the glass surface with warm, soapy water to remove any remaining peanut butter and adhesive particles.
- Rinse Thoroughly: Rinse the glass jar under running water to ensure it is free from any residual peanut butter.
- Dry the Glass Jar: Thoroughly dry the glass jar before use or storage.
This method is unconventional but effective, and it’s particularly suitable for those who prefer using natural and household items for cleaning. The oils in peanut butter can help break down the adhesive, and the process leaves a pleasant fragrance. However, it’s advisable to test a small area first, especially on jars with special finishes or colours, to ensure compatibility.
17. Commercial Adhesive Removers
Commercial adhesive removers are specialised products designed to efficiently and effectively dissolve and remove adhesives, including those found on labels, stickers, and tapes. One popular choice is Goo Gone. These products are available in various formulations, and their usage typically involves the following steps:
- Choose a Suitable Commercial Adhesive Remover: Select a commercial adhesive remover based on the type of adhesive you are dealing with and the surface it’s adhered to. Common types include citrus-based removers, solvent-based removers, and gel formulations.
- Read and Follow Product Instructions: Before applying the adhesive remover, carefully read and follow the instructions provided by the manufacturer. Pay attention to safety precautions and application guidelines.
- Apply Adhesive Remover to the Label: Apply the commercial adhesive remover directly onto the label or adhesive residue. Ensure that the affected area is well-saturated with the product.
- Allow Time for Penetration: Let the adhesive remover sit on the label or residue for the specified period mentioned in the product instructions. This allows the chemicals in the remover to break down the adhesive.
- Peel Off the Label: After the soaking period, gently peel off the label. The adhesive remover should have softened the adhesive, making it easier to remove.
- Wipe Away Residue: Use a cloth or sponge to wipe away any remaining adhesive residue on the glass jar. The adhesive remover often includes chemicals that facilitate the cleaning process.
- Clean the Glass Surface: Clean the glass surface with warm, soapy water to remove any remaining adhesive remover and adhesive particles.
- Rinse Thoroughly: Rinse the glass jar under running water to ensure it is free from any residual adhesive remover.
- Dispose of Materials Properly: Dispose of any used materials, such as cloths or cotton balls, according to the instructions on the product packaging.
Commercial adhesive removers are effective and convenient, especially for stubborn adhesives. However, it’s important to use them in well-ventilated areas, follow safety guidelines, and be aware of their compatibility with different surfaces, as some formulations may damage certain materials.
18. Mayonnaise Method
The mayonnaise method is a somewhat unconventional yet effective technique for removing sticky labels from glass jars. Mayonnaise contains oils and acids that can help break down adhesive residues, making label removal easier.
- Select Full-Fat Mayonnaise: Choose a full-fat, regular mayonnaise for this method. The oils and acidity in mayonnaise contribute to its adhesive-dissolving properties.
- Apply Mayonnaise to the Label: Spread a thick layer of mayonnaise directly onto the label of the glass jar. Ensure that the entire label is covered with a generous coating.
- Allow Time to Sit: Allow the mayonnaise to sit on the label for an extended period, typically around 1-2 hours. This gives the oils and acids in the mayonnaise time to penetrate and loosen the adhesive.
- Peel Off the Label: After the soaking period, peel off the label. The mayonnaise should have softened the adhesive, making it easier to remove the label.
- Wipe Away Residue: Use a cloth or sponge to wipe away any remaining adhesive residue on the glass jar. The oils in mayonnaise also contribute to cleaning the glass surface.
- Clean the Glass Surface: Clean the glass surface with warm, soapy water to remove any remaining mayonnaise and adhesive particles.
- Rinse Thoroughly: Rinse the glass jar under running water to ensure it is free from any residual mayonnaise.
- Dry the Glass Jar: Thoroughly dry the glass jar before use or storage.
The mayonnaise method is a kitchen-friendly approach that utilizes common household items. The oils and acids in mayonnaise can effectively break down adhesive residues, making it a surprisingly efficient and natural solution for label removal.
19. Salt and Olive Oil Scrub
The salt and olive oil scrub method is a natural and abrasive approach to removing sticky labels from glass jars. The combination of coarse salt and olive oil creates a scrub that helps break down adhesive residues and provides a gentle abrasive action for effective label removal.
- Mix Coarse Salt and Olive Oil: Combine coarse salt and olive oil to form a thick, gritty paste. Adjust the ratio as needed, but a common mixture is about 2 parts salt to 1 part olive oil.
- Apply the Scrub to the Label: Spread the salt and olive oil scrub directly onto the label of the glass jar, ensuring full coverage.
- Scrub Gently in Circular Motions: Use your fingers or a cloth to gently scrub the label in circular motions. The coarse salt acts as a natural abrasive, lifting the label, while the olive oil breaks down the adhesive.
- Continue Scrubbing: Keep scrubbing until the label is completely lifted. The abrasive action of the salt and the adhesive-dissolving properties of the olive oil work together for efficient removal.
- Wipe Away Residue: Use a damp cloth or sponge to wipe away any remaining adhesive residue on the glass jar.
- Clean the Glass Surface: Wash the glass surface with warm, soapy water to remove any remaining salt, olive oil residue, and adhesive particles.
- Rinse Thoroughly: Rinse the glass jar under running water to ensure it is free from any residual scrub mixture.
- Dry the Glass Jar: Thoroughly dry the glass jar before use or storage.
This method provides a natural and homemade solution for label removal, utilizing the abrasive properties of salt and the adhesive-dissolving qualities of olive oil. It’s a gentle yet effective approach, and the ingredients are commonly found in most kitchens. As always, it’s advisable to test a small area first to ensure compatibility, especially on coloured or painted glass surfaces.
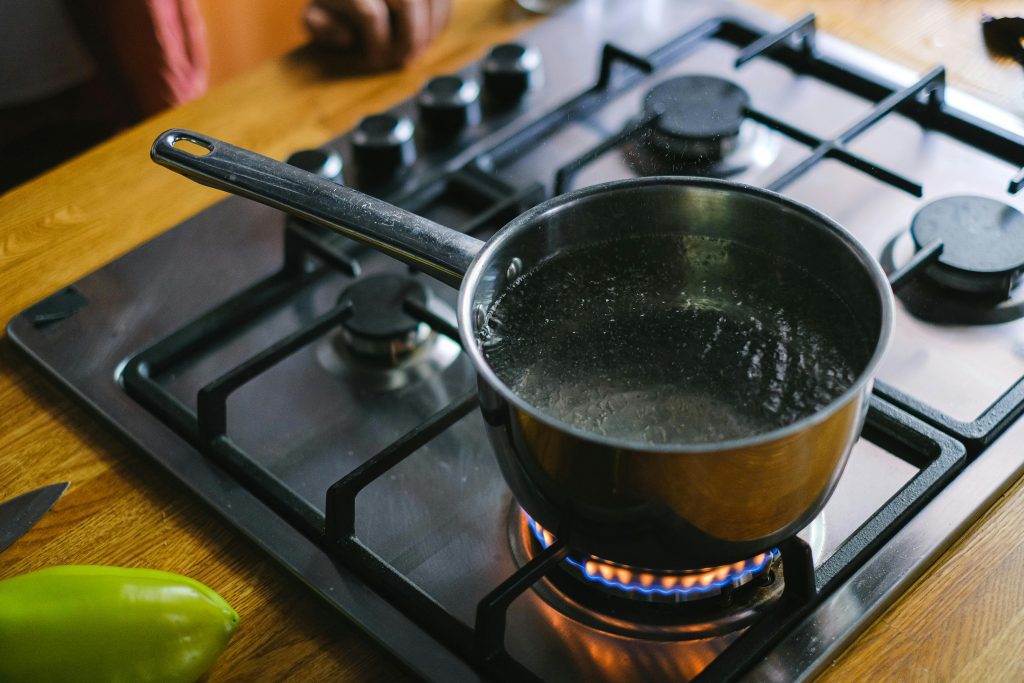
20. Steam
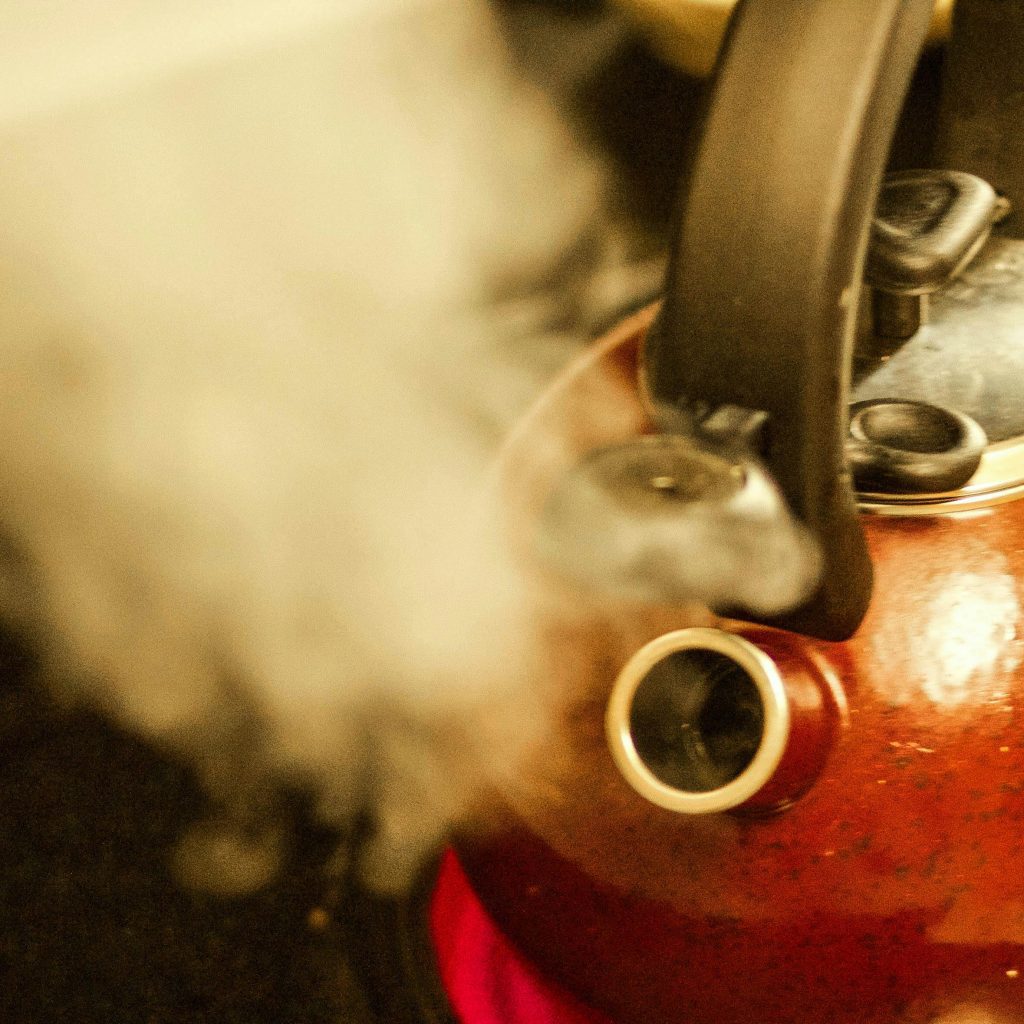
The steam method utilizes heat and moisture to loosen the adhesive on glass jars, making it easier to peel off labels. This technique is effective and straightforward.
- Boil Water: Bring a pot of water to a boil on the stove. Ensure there is enough water to generate steam for an extended period.
- Hold Jar Over Steam: Hold the glass jar, label-side down, over the steam rising from the boiling water. Keep a safe distance to avoid burns.
- Steam the Label for 1-2 Minutes: Allow the label to be exposed to the steam for approximately 1-2 minutes. The heat and moisture will work to soften the adhesive.
- Peel Off the Label: After steaming, use your fingers or a tool like a knife or credit card to gently peel off the label. The softened adhesive should make removal easier.
- Wipe Away Residue: If there’s any remaining adhesive residue, use a cloth or sponge to wipe it away while it’s still warm.
- Clean the Glass Jar: Rinse the glass jar under running water to remove any remaining residue or steam-related moisture.
- Dry the Glass Jar: Thoroughly dry the glass jar before using or storing it to prevent any potential moisture-related issues.
The steam method is ideal for those who want a quick and water-based solution without using chemicals. It’s effective for labels on glass jars and can be easily done using common kitchen items. However, exercise caution to avoid burns when working with hot steam.
21. Window Cleaner
The window cleaner method utilizes a commercial window cleaner, often containing alcohol and surfactants, to remove sticky labels from glass jars. This method is quick and convenient, providing effective results.
- Select a Commercial Window Cleaner: Choose a commercial window cleaner containing alcohol for adhesive-dissolving properties.
- Spray the Window Cleaner on the Label: Directly spray the window cleaner onto the label of the glass jar, ensuring thorough saturation.
- Allow Time to Penetrate: Let the window cleaner sit on the label for a few minutes, allowing the alcohol to break down the adhesive.
- Peel Off the Label: After the soaking period, peel off the label. The softened adhesive should make the label removal smoother.
- Wipe Away Residue: Use a cloth or sponge to wipe away any remaining adhesive residue on the glass jar. The surfactants assist in lifting sticky remnants.
- Clean the Glass Surface: Wash the glass surface with warm, soapy water to remove any remaining window cleaner and adhesive particles.
- Rinse Thoroughly: Rinse the glass jar under running water to ensure it is free from any residual window cleaner.
- Dry the Glass Jar: Thoroughly dry the glass jar before use or storage.
This method is suitable for those looking for a quick and effective solution using a commonly available household item. Commercial window cleaners are formulated to cut through dirt and grime, making them effective for adhesive removal as well. However, as with any method, it’s advisable to test a small area first, especially on jars with special finishes or colors, to ensure compatibility.
22. Cornstarch and Water Paste
The cornstarch and water paste method is a simple and natural solution for removing sticky labels from glass jars. The paste acts as a gentle abrasive and adhesive-dissolving agent, making label removal easier.
- Mix Cornstarch and Water: Combine cornstarch and water in a bowl to create a thick paste. A common ratio is approximately 2 parts cornstarch to 1 part water. Adjust as needed to achieve a paste-like consistency.
- Apply the Paste to the Label: Spread the cornstarch and water paste directly onto the label of the glass jar. Ensure that the entire label is covered with a generous layer of the paste.
- Allow Time to Set: Let the paste sit on the label for an extended period, typically around 30 minutes to 1 hour. This gives the cornstarch time to absorb moisture and work on the adhesive.
- Peel Off the Label: After the setting period, use your fingers or a tool like a knife or credit card to gently peel off the label. The cornstarch paste should have softened the adhesive, making label removal smoother.
- Wipe Away Residue: If there’s any remaining adhesive residue, use a cloth or sponge to wipe it away while it’s still moist.
- Clean the Glass Surface: Wash the glass surface with warm, soapy water to remove any remaining cornstarch paste and adhesive particles.
- Rinse Thoroughly: Rinse the glass jar under running water to ensure it is free from any residual paste.
- Dry the Glass Jar: Thoroughly dry the glass jar before use or storage.
This method is a natural and eco-friendly alternative, utilizing the gentle abrasive nature of cornstarch and its ability to absorb moisture. It’s suitable for those who prefer non-chemical solutions for label removal. However, as with any method, it’s advisable to test a small area first, especially on colored or painted glass surfaces, to ensure compatibility.
23. Hairspray Technique
The hairspray method involves using hairspray, which typically contains alcohol and other solvents, to remove sticky labels from glass jars. The alcohol in hairspray helps break down adhesive residues, making label removal easier.
- Select a Hairspray with Alcohol Content: Choose a hairspray containing alcohol, which acts as the active ingredient for adhesive dissolution.
- Spray Hairspray on the Label: Directly spray the hairspray onto the label of the glass jar, ensuring thorough saturation.
- Allow Time to Penetrate: Let the hairspray sit on the label for a few minutes, allowing the alcohol to break down the adhesive.
- Peel Off the Label: After the soaking period, peel off the label. The softened adhesive should make the label removal smoother.
- Wipe Away Residue: Use a cloth or sponge to wipe away any remaining adhesive residue on the glass jar.
- Clean the Glass Surface: Wash the glass surface with warm, soapy water to remove any remaining hairspray and adhesive particles.
- Rinse Thoroughly: Rinse the glass jar under running water to ensure it is free from any residual hairspray.
- Dry the Glass Jar: Thoroughly dry the glass jar before use or storage.
This method is suitable for those looking for a quick and readily available solution using a common household item. Hairspray, with its alcohol content, effectively acts as a solvent to break down adhesives. However, it’s advisable to test a small area first, especially on coloured or painted glass surfaces, to ensure compatibility.
Dealing with Stubborn Labels
Dealing with stubborn labels on glass jars often requires a strategic combination of techniques to effectively tackle the adhesive residue. When faced with particularly resistant labels, a multi-step approach can yield superior results. One effective strategy is to start with a hot water soak, utilizing the power of heat to soften the adhesive. Following this initial step, apply a layer of oil, such as vegetable or olive oil, and allow it to penetrate the label for an extended period. The oil’s adhesive-dissolving properties complement the heat, providing a one-two punch to break down stubborn residues.
For labels that persist even after the hot water and oil treatment, incorporating an abrasive element like a salt and olive oil scrub can further enhance the removal process. The coarse salt acts as a natural scrub, aiding in lifting the label, while the olive oil contributes to breaking down the remaining adhesive. Additionally, if traces of sticky residue persist, a final wipe with a cloth soaked in a commercial adhesive remover or a window cleaner containing alcohol can ensure a thorough cleaning, leaving the glass jar pristine.
By combining these techniques, users can create a synergistic effect, harnessing the unique benefits of each method to conquer even the most stubborn labels. It’s essential to adapt the approach based on the specific characteristics of the label and the glass jar to achieve optimal results while ensuring the safety of the glass surface.
Preventing Damage to Glass Jars
When undertaking label removal techniques on glass jars, preventing damage to the glass itself is crucial for preserving the container’s integrity and aesthetic appeal. To ensure a gentle and non-abrasive process, it’s essential to start with the least aggressive methods, such as soaking in hot water or applying oil. These techniques allow the adhesive to loosen without subjecting the glass to potential scratches or damage.
Moreover, selecting the right tools is paramount in safeguarding glass jars. Opt for soft materials like microfiber cloths or non-abrasive sponges during the cleaning process to minimize the risk of scratching the glass surface. When using abrasive methods like salt and olive oil scrubs, apply gentle pressure and avoid using tools that could cause damage. Additionally, it’s advisable to test any chosen method on a small, inconspicuous area of the glass jar before proceeding to ensure compatibility and prevent unintended consequences.
For particularly delicate or decorated glass surfaces, exercising caution becomes even more critical. When combining techniques, be mindful of the jar’s material and finish to avoid compromising its visual appeal. Taking a step-by-step, patient approach and adapting the method based on the specific characteristics of the glass jar will help ensure that the label removal process is effective while preserving the jar’s pristine condition.
Techniques to Remove Sticky Residue
Once the label has been successfully removed from a glass surface, dealing with any lingering sticky residue requires a tailored approach to ensure a pristine and clean finish. A straightforward yet effective method involves using common household oils, such as vegetable or olive oil. Apply a small amount of oil directly onto the sticky residue and let it sit for approximately 15-30 minutes. The oil works to break down the adhesive, making it easier to wipe away. Gently rub the residue with a soft cloth or sponge, and follow up with a thorough cleaning using warm, soapy water to remove any remaining oil and adhesive particles.
For those seeking a more targeted solution, white vinegar proves to be a versatile and effective adhesive remover. Dampen a cloth or sponge with white vinegar and gently rub the sticky residue. The acidic nature of vinegar aids in dissolving the adhesive, facilitating its removal. Ensure to rinse the glass surface thoroughly with water after using vinegar to eliminate any residual solution.
In instances where the sticky residue persists, commercial adhesive removers designed for glass surfaces offer a powerful solution. Follow the product instructions, apply the remover to the residue and allow it to sit for the specified time. These removers often contain specialized chemicals that efficiently dissolve adhesives. Once the adhesive is loosened, wipe the surface clean and rinse it thoroughly to remove any remaining residue and cleaning solution. Choosing the right method depends on the type of adhesive and the glass surface, so it’s advisable to test a small area first and proceed with care to avoid any potential damage.
Why Remove Labels from Glass Jars?
There are many possible reasons why people may want to remove sticky labels from glass jars:
- Aesthetics: Labels on glass jars can often be unsightly, especially if they are difficult to remove or if the jar is being repurposed for a different use. Removing the labels can give the jar a cleaner and more attractive appearance.
- Reuse or Repurposing: Many people like to reuse glass jars for various purposes such as storage, organizing, or crafting. Removing the labels allows for a blank canvas and makes it easier to repurpose the jars for new uses.
- Gifts or Homemade Products: If you plan to use glass jars for homemade gifts or products, having a clean and label-free surface allows for better presentation. It also ensures that the focus is on the contents rather than on any existing labels.
- Avoiding Residue: Labels often leave behind adhesive residue, and this residue can collect dirt and dust over time. Removing the labels helps to eliminate the sticky residue, keeping the jar cleaner and making it more pleasant to handle.
- Uniformity in Storage: Removing labels from glass jars used for kitchen storage or pantry organization creates a more uniform and organized look. It also makes it easier to see the contents clearly.
- Recycling: Properly cleaned glass jars are more likely to be accepted in recycling programs. Some recycling facilities may have specific guidelines for the types of labels or adhesives that can be present on glass containers.
- Personalization: When reusing glass jars for events, parties, or special occasions, having a label-free surface provides a neutral background that can be easily personalized with custom labels, decorations, or designs.
- Avoiding Chemical Residues: Some labels may contain adhesives with chemicals that could potentially contaminate recycling streams. Removing labels mitigates the risk of introducing such residues into recycling processes, supporting the production of cleaner recycled materials.
It’s important to note that different methods may be more effective for different types of labels and adhesives, and some methods may be more suitable for certain types of glass. Always test a small area first and use caution to avoid damaging the glass while attempting to remove labels.
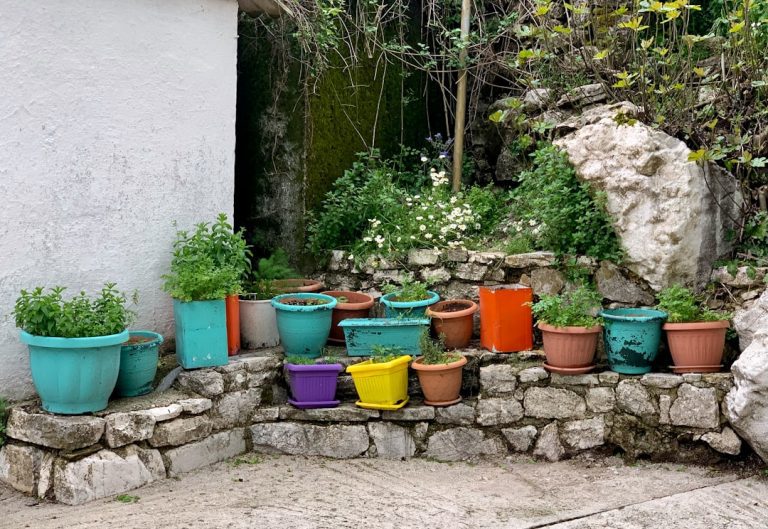
Reusing Glass Bottles and Jars
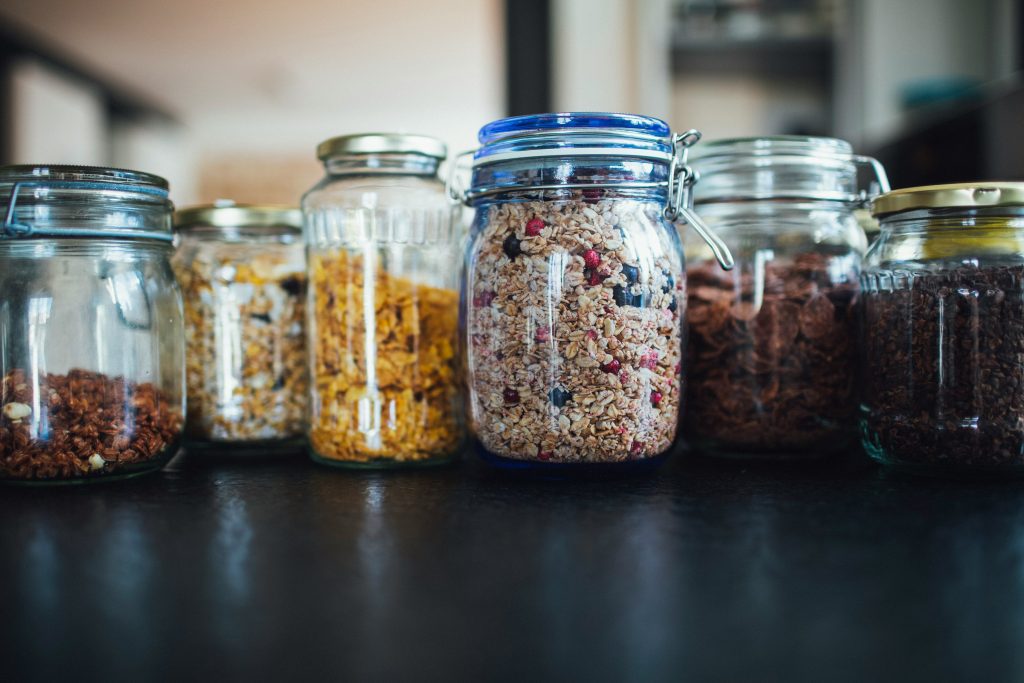
Reusing glass jars and bottles is an excellent sustainable practice that not only reduces waste but also adds a touch of creativity and resourcefulness to daily life. Here are several ways to make the most out of glass containers:
Storage Containers
Glass jars are ideal for storing various kitchen items. They can hold dry goods like rice, pasta, and grains, or be used for liquids such as soups, sauces, and homemade dressings. The transparent nature of glass makes it easy to identify the contents.
Food Preservation
Glass jars are perfect for home canning and preserving fruits, vegetables, jams, and pickles. The airtight seal ensures the freshness and longevity of the preserved items.
Bulk Shopping
Bring your glass jars to bulk stores and refill them with staples like nuts, seeds, cereals, or even liquids like oils and vinegars. This reduces the need for single-use packaging.
DIY Gifts
Decorate and fill glass jars with homemade treats, such as cookies, layered cake mixes, or bath salts, to create thoughtful and sustainable gifts for friends and family.
Candle Holders
Remove labels and repurpose glass jars as candle holders. Add a layer of sand or pebbles at the bottom for stability, then place a tea light or a small candle inside for a cozy and eco-friendly lighting solution.
DIY Terrariums
Create mini ecosystems by turning glass jars into terrariums. Layer soil, rocks, and small plants to make charming indoor gardens.
Beverage Containers
Reuse glass bottles for beverages by filling them with homemade juices, infused water, or even cold-brew coffee. This helps reduce the need for single-use plastic bottles.
Vases for Flowers
Remove labels and use glass bottles as vases for fresh flowers. Their sleek design adds a touch of elegance to floral arrangements.
Art and Craft Storage
Glass jars are perfect for organizing small art supplies like buttons, beads, or paintbrushes. Arrange them on a shelf or in a drawer for easy access.
DIY Herb Garden
Transform glass jars into mini herb gardens by planting herbs like basil, mint, or cilantro. Place them on a sunny windowsill for fresh herbs at your fingertips.
Homemade Sauces and Dressings
Fill glass bottles with homemade sauces, dressings, or infused oils. This not only reduces packaging waste but also allows you to control the ingredients in your condiments.
Travel Containers
Use smaller glass jars to store travel-sized amounts of toiletries like shampoo, conditioner, or face wash. This eliminates the need for disposable travel-sized plastic containers.
By reusing glass jars and bottles creatively, individuals can minimize waste, save money, and contribute to a more sustainable and eco-friendly lifestyle. The versatility of glass containers makes them a valuable resource in promoting a circular economy and reducing reliance on single-use items.
Warnings and considerations of removing labels
While removing labels from glass jars and bottles is a common practice, it’s essential to proceed with caution to avoid potential issues. Here are some warnings and considerations to keep in mind:
- Glass Fragility:
- Glass jars and bottles can be fragile, especially if they are thin or have decorative elements. Apply gentle pressure during label removal to avoid cracking or breaking the glass.
- Adhesive Residue Variability:
- Adhesive types used for labels can vary. Some may come off easily with heat or oil, while others might require more aggressive methods. Always test a small, inconspicuous area first to understand the adhesive’s response to the chosen removal technique.
- Painted or Colored Glass:
- Be cautious when removing labels from painted or colored glass, as certain methods may affect the finish. Test on a small area to ensure the removal technique doesn’t damage or discolor the glass.
- Surface Sensitivity:
- Some glass surfaces are sensitive to chemicals or abrasives. If the glass has a coating, texture, or special finish, choose removal methods carefully to avoid damaging or altering the appearance of the glass.
- Potential for Scratching:
- Abrasive methods, such as scrubbing with salt, may scratch the glass surface, particularly if it has a delicate finish. Use softer methods like oil or heat for more delicate glass.
- Adhesive Remover Compatibility:
- Commercial adhesive removers may contain strong chemicals. Ensure the chosen remover is compatible with glass and won’t cause damage. Follow the product instructions carefully.
- Heat and Temperature Variations:
- Rapid temperature changes can stress glass and may lead to breakage. Avoid exposing glass jars or bottles to extreme temperature variations during label removal or cleaning.
- Potential for Personal Injury:
- Some removal methods involve sharp objects, such as razor blades or knives, which may pose a risk of personal injury. Use caution and follow proper safety guidelines when using such tools.
- Label Content and Safety Information:
- Some labels may contain important safety information or product details. Ensure that removing the label doesn’t impact your ability to identify or safely use the contents of the jar or bottle.
- Disposal of Removed Labels:
- Dispose of removed labels responsibly. Labels may contain inks, adhesives, or coatings that could be harmful to the environment. Consider recycling or disposing of labels properly.
- Reusability Consideration:
- If the glass jar or bottle is intended for reuse, ensure that the removal method doesn’t compromise its future functionality or safety. Thoroughly clean and rinse the glass after label removal.
By approaching label removal with care and considering the specific characteristics of the glass and labels involved, individuals can achieve clean and reusable glass containers without compromising their structural integrity or aesthetic appeal. Always prioritize safety and test removal methods in inconspicuous areas to assess their impact on the glass surface.
Step-by-step guide for soaking jars in hot water to remove Sticky Labels from Glass Jars
Materials Needed:
- Glass jars with sticky labels
- Hot water
- Dish soap (optional)
- Bowl, sink, or basin
- Sponge or soft brush
- Towel or paper towels
Step 1: Gather Your Materials
Collect the glass jars you want to clean, ensuring they are free of any leftover contents. Assemble a bowl, sink, or basin large enough to submerge the jars in hot water.
Step 2: Fill the Container with Hot Water
Fill the chosen container with hot water. The water should be hot enough to the touch but not boiling. You can use water straight from the tap or heat it on the stove, depending on your preference.
Step 3: Add Dish Soap (Optional)
For added effectiveness, you can add a few drops of dish soap to the hot water. This can help break down the adhesive on the labels. Mix the soap in the water if you choose to use it.
Step 4: Submerge the Glass Jars
Carefully place the glass jars into the hot water, ensuring that the labels are completely submerged. Allow them to soak for at least 15 to 30 minutes. The heat will soften the adhesive, making it easier to peel off the labels.
Step 5: Peel Off the Labels
After soaking, take one glass jar out of the hot water at a time. Peel off the label starting from one corner. If the label resists, use a sponge or a soft brush to gently scrub away the loosened paper.
Step 6: Scrub Remaining Residue (If Necessary)
If any adhesive residue remains on the glass, use a sponge or soft brush to scrub it away. You can also apply gentle pressure with your fingers to roll off the residue.
Step 7: Rinse and Dry
Rinse the glass jars thoroughly under running water to remove any soap or residue. Dry them with a towel or paper towels.
Step 8: Repeat as Needed
If some labels prove stubborn, you may need to repeat the soaking process or try additional methods mentioned in our eco-friendly blog post.
Step 9: Admire Your Label-Free Glass Jars
Behold your sparkling, label-free glass jars! Use them for storage, crafts, or whatever eco-friendly purpose you have in mind.
By following these steps, you’ll be able to effortlessly remove sticky labels from glass jars using the power of hot water and, if desired, a touch of dish soap. Happy repurposing!